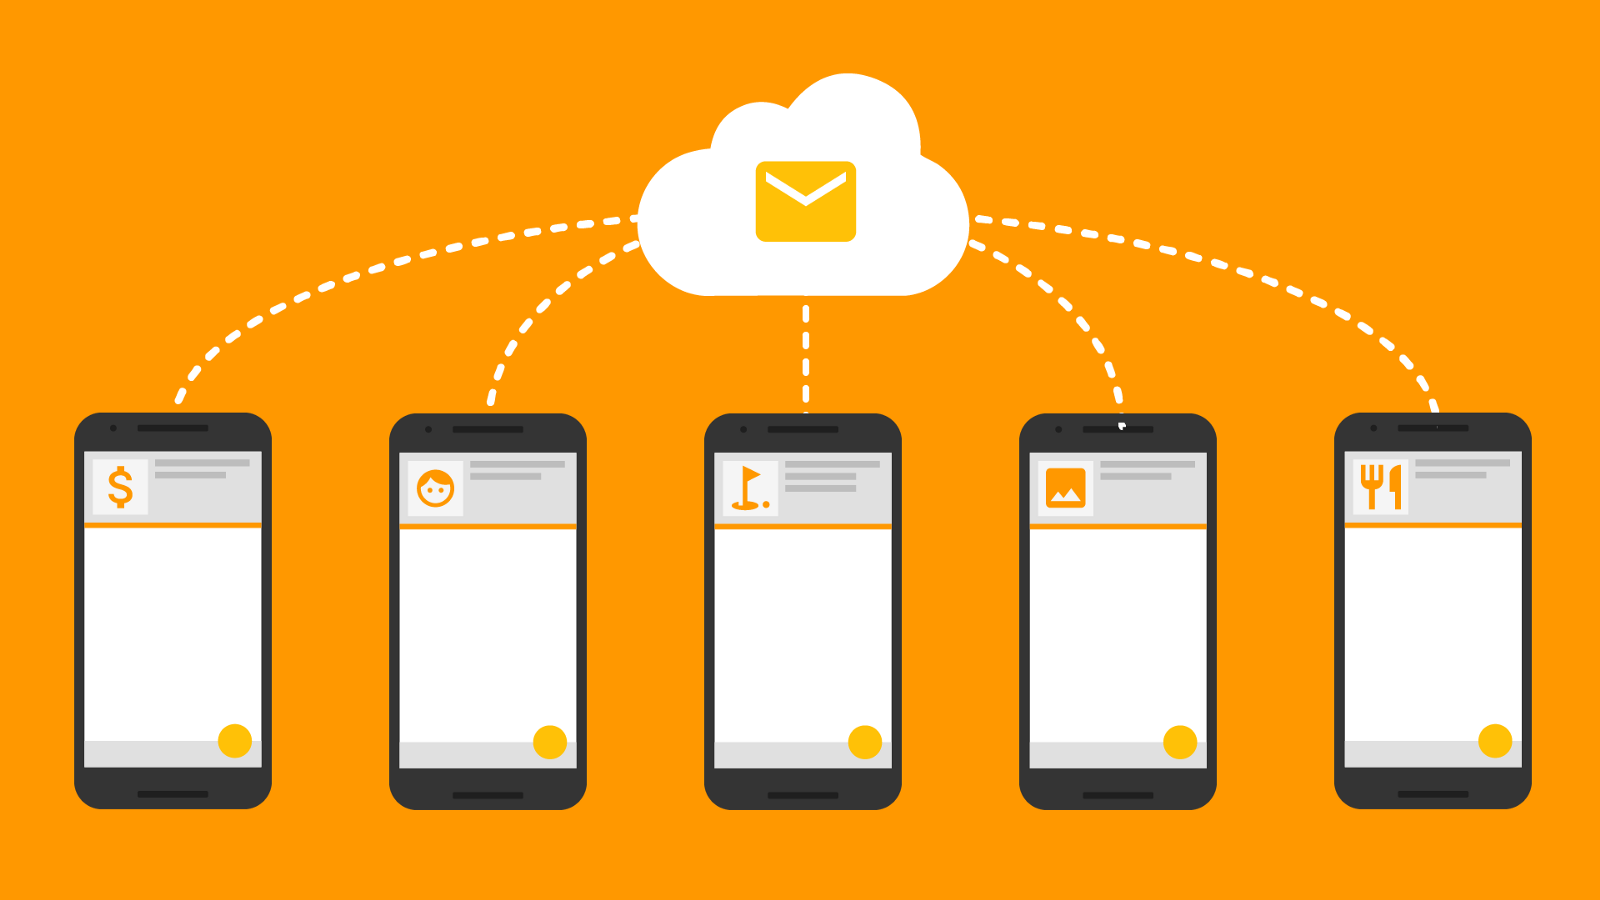
Push Notifications are one-way forms of communication offered to mobile users that some operation (like an update, deletion, or addition) has happened.
To send a push notification to an Apple device, use the Apple Push Services. For an Android device, use Google’s Firebase Cloud Messaging Services. Fortunately, if you’re sending a push notification to an app on both platforms, Microsoft offers an easier way through Microsoft Azure Notification Hub.
Go to the Azure portal.
- Click “Create a resource”, “Web + Mobile” and select “Notification Hub.

- In the new window, enter the notification hub name and create a new namespace.
- Select a location. We recommend a location closest to the user or closest to you (the developer).
- Choose an existing resource group or create a new resource group.
- Select your Microsoft subscription (for billing purposes).
- Choose a pricing tier based on your usage needs and click “Select” to close the pricing tab.
- Click “Create” to create the new notification hub. It may take few minutes to create and configure.

Choose the “Google (GCM)” from the side menu. This section is used to configure and send Android-based push notifications using Firebase cloud messaging.

Create the Firebase Push Notifcation
- Open a new browser window and navigate to https://console.firebase.google.com/.
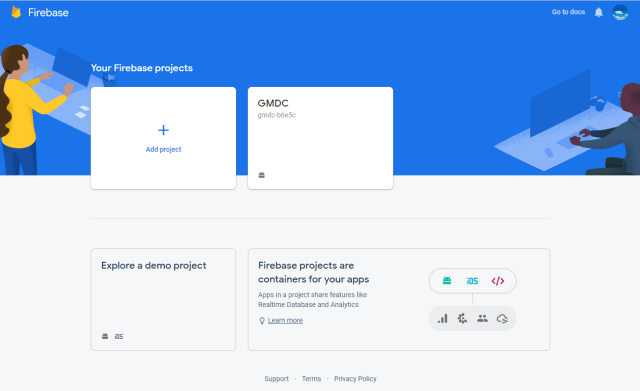
- Login or create a new account. After you have logged in, click “+ Add Project”.

- Enter the Project Name and Country/region. You can change the Project ID if required.
- Click “CREATE PROJECT.” It may take a few minutes to create the project.
- After the message “Your new project is ready”, click “CONTINUE” to navigate to the project page.

- In the new page, select “Add Firebase to your Android app” to create an Android-based Firebase app.

- In the next screen, enter the “Android package name” and enter an optional app nickname. Select “REGISTER APP.”

- In the next screen, click “Download google-services.json” and download the file.

- Open the downloaded file and copy the project number (a 12-digit code like 272477558565) into the project’s AppSettings.cs file for FirebaseSenderID.
Create push services for iOS
- Select “Apple (APNS)” from the Azure portal side menu.

- Upload a certificate to send push notifications on iOS. Log in to https://developer.apple.com.
- Navigate to “Certificates, Identifiers and Profiles.”

- Select the Apple ID associated with the application.
- Ensure that the ID is configured to use Push Notifications. It should have the status as Configurable. Click “Edit” to configure push services.

- In the next screen, choose to create either a development or production SSL certificate and click “Create Certificate.”

- The next screen requires you to create a “certSigningRequest”. Create the file and upload it.
- On the Mac, open the “Keychain Access” application: press WinKey + Spacebar to open Spotlight. Type “keychain access” and press enter.
- Select Keychain Access -> Certificate Assistant -> Request a Certificate From a Certificate Authority.

- Enter the user email address, command name, and Certificate Authority (CA) Email address.
- Select “Saved to disk” and click “Continue”.

- In the popup dialog, save the certSigningRequest.
- Choose a location. If you’re choosing a default location, make sure to note the location for future purposes.
- Now navigate back to the apple developer website and upload the previously created certSigningRequest and select “Continue.”

- In the next screen, click “Download” button to download the .cer file. After downloading the file, select “Done” and close the browser.

- Double click to open the .cer file. It will by default open the Keychain Access application.
- Enter the administrator password to install the .cer file.

- Right-click on the certificate and choose “Export [Certificate Name].”
 Enter a name for the “.p12” file. Select the location of the file and click “Save.” Make sure the file format is “Personal Information Exchange (.p12)” before saving the file.
- Enter a password for the p12 file. Re-enter the password.

- Enter the administrator password for Keychain Access application to export the key and select “Allow.”

Now navigate back to the Azure portal.
- Select Folder Icon.

- Find the p12 file and click “Open.” Enter the same password used to create the file. Save.

- Open the Backend Mobile app service from the Azure portal and navigate to “Push” from the sidebar menu.
- Connect to the notification hub we created earlier.

- Choose the previously created notification hub.

- On the next screen, add the tag “UserGroup1” for push notifications to be delivered to the mobile devices. Save.

Xamarin.Forms application functionality
The sample Xamarin.Forms application displays a list of push notification messages. This is achieved with the AddMessage method, which adds the specified push notification message to the UI. This method also prevents duplicate messages from being added to the UI, and runs on the main thread so it can be called from any thread. The following code shows the AddMessage method:
public void AddMessage(string message)
{
    Device.BeginInvokeOnMainThread(() =>
    {
        if (messageDisplay.Children.OfType<Label>().Where(c => c.Text == message).Any())
        {
            // Do nothing, an identical message already exists
        }
        else
        {
            Label label = new Label()
            {
                Text = message,
                HorizontalOptions = LayoutOptions.CenterAndExpand,
                VerticalOptions = LayoutOptions.Start
            };
            messageDisplay.Children.Add(label);
        }
    });
}
The sample application contains an AppConstants.cs file, which defines properties used by the platform projects. This file needs to be customized with values from your Azure Notification Hub. The following code shows the AppConstants.cs file:C#Copy
public static class AppConstants
{
    public static string NotificationChannelName { get; set; } = "XamarinNotifyChannel";
    public static string NotificationHubName { get; set; } = "< Insert your Azure Notification Hub name >";
    public static string ListenConnectionString { get; set; } = "< Insert your DefaultListenSharedAccessSignature >";
    public static string DebugTag { get; set; } = "XamarinNotify";
    public static string[] SubscriptionTags { get; set; } = { "default" };
    public static string FCMTemplateBody { get; set; } = "{\"data\":{\"message\":\"$(messageParam)\"}}";
    public static string APNTemplateBody { get; set; } = "{\"aps\":{\"alert\":\"$(messageParam)\"}}";
}
Customize the following values in AppConstants to connect the sample application to your Azure Notification Hub:
NotificationHubName: Use the name of the Azure Notification Hub you created in your Azure portal.ListenConnectionString: This value is found in the Azure Notification Hub under Access Policies.
The following screenshot shows where these values are located in the Azure portal:

Configure the Android application for notifications
Complete the following steps to configure the Android application to receive and process notifications:
- Configure the Android Package name to match the package name in the Firebase console.
- Install the following NuGet packages to interact with Google Play, Firebase and Azure Notification Hubs:
- Xamarin.GooglePlayServices.Base.
- Xamarin.Firebase.Messaging.
- Xamarin.Azure.NotificationHubs.Android.
- Copy the
google-services.jsonfile that you downloaded during FCM setup to the project and set the Build Action toGoogleServicesJson. - Configure AndroidManifest.xml to communicate with Firebase.
- Override FirebaseMessagingService to handle messages.
- Add incoming notifications to Xamarin.Forms UI.
Note
The GoogleServicesJson build action is part of the Xamarin.GooglePlayServices.Base NuGet package. Visual Studio 2019 sets the available Build Actions during startup. If you do not see GoogleServicesJson as a Build Action, restart Visual Studio 2019 after installing the NuGet packages.
Configure Android manifest
The receiver elements within the application element allow the app to communicate with Firebase. The uses-permission elements allow the app to handle messages and register with Azure Notification Hub. The complete AndroidManifest.xml should look similar to the example below:XMLCopy
<manifest xmlns:android="https://schemas.android.com/apk/res/android" android:versionCode="1" android:versionName="1.0" package="YOUR_PACKAGE_NAME" android:installLocation="auto">
  <uses-sdk android:minSdkVersion="21" />
  <uses-permission android:name="android.permission.INTERNET" />
  <uses-permission android:name="com.google.android.c2dm.permission.RECEIVE" />
  <uses-permission android:name="android.permission.WAKE_LOCK" />
  <uses-permission android:name="android.permission.GET_ACCOUNTS"/>
  <application android:label="Notification Hub Sample">
    <receiver android:name="com.google.firebase.iid.FirebaseInstanceIdInternalReceiver" android:exported="false" />
    <receiver android:name="com.google.firebase.iid.FirebaseInstanceIdReceiver" android:exported="true" android:permission="com.google.android.c2dm.permission.SEND">
      <intent-filter>
        <action android:name="com.google.android.c2dm.intent.RECEIVE" />
        <action android:name="com.google.android.c2dm.intent.REGISTRATION" />
        <category android:name="${applicationId}" />
      </intent-filter>
    </receiver>
  </application>
</manifest>
Override FirebaseMessagingService to handle messages
To register with Firebase and handle messages, subclass the FirebaseMessagingService class. The sample application defines a FirebaseService class that subclasses the FirebaseMessagingService. This class is tagged with an IntentFilter attribute, which includes the com.google.firebase.MESSAGING_EVENT filter. This filter allows Android to pass incoming messages to this class for handling:C#Copy
[Service]
[IntentFilter(new[] { "com.google.firebase.MESSAGING_EVENT" })]
public class FirebaseService : FirebaseMessagingService
{
    // ...
}
When the application is started, the Firebase SDK will automatically request a unique token identifier from the Firebase server. Upon successful request, the OnNewToken method will be called on the FirebaseService class. The sample project overrides this method and registers the token with Azure Notification Hubs:C#Copy
public override void OnNewToken(string token)
{
    // NOTE: save token instance locally, or log if desired

    SendRegistrationToServer(token);
}

void SendRegistrationToServer(string token)
{
    try
    {
        NotificationHub hub = new NotificationHub(AppConstants.NotificationHubName, AppConstants.ListenConnectionString, this);

        // register device with Azure Notification Hub using the token from FCM
        Registration registration = hub.Register(token, AppConstants.SubscriptionTags);

        // subscribe to the SubscriptionTags list with a simple template.
        string pnsHandle = registration.PNSHandle;
        TemplateRegistration templateReg = hub.RegisterTemplate(pnsHandle, "defaultTemplate", AppConstants.FCMTemplateBody, AppConstants.SubscriptionTags);
    }
    catch (Exception e)
    {
        Log.Error(AppConstants.DebugTag, $"Error registering device: {e.Message}");
    }
}
The SendRegistrationToServer method registers the device with the Azure Notification Hub and subscribes to tags with a template. The sample application defines a single tag called default and a template with a single parameter called messageParam in the AppConstants.cs file. For more information about registration, tags, and templates, see Register templates and tags with the Azure Notification Hub.
When a message is received, the OnMessageReceived method will be called on the FirebaseService class:C#Copy
public override void OnMessageReceived(RemoteMessage message)
{
    base.OnMessageReceived(message);
    string messageBody = string.Empty;

    if (message.GetNotification() != null)
    {
        messageBody = message.GetNotification().Body;
    }

    // NOTE: test messages sent via the Azure portal will be received here
    else
    {
        messageBody = message.Data.Values.First();
    }

    // convert the incoming message to a local notification
    SendLocalNotification(messageBody);

    // send the incoming message directly to the MainPage
    SendMessageToMainPage(messageBody);
}

void SendLocalNotification(string body)
{
    var intent = new Intent(this, typeof(MainActivity));
    intent.AddFlags(ActivityFlags.ClearTop);
    intent.PutExtra("message", body);

    //Unique request code to avoid PendingIntent collision.
    var requestCode = new Random().Next();
    var pendingIntent = PendingIntent.GetActivity(this, requestCode, intent, PendingIntentFlags.OneShot);

    var notificationBuilder = new NotificationCompat.Builder(this)
        .SetContentTitle("XamarinNotify Message")
        .SetSmallIcon(Resource.Drawable.ic_launcher)
        .SetContentText(body)
        .SetAutoCancel(true)
        .SetShowWhen(false)
        .SetContentIntent(pendingIntent);

    if (Build.VERSION.SdkInt >= BuildVersionCodes.O)
    {
        notificationBuilder.SetChannelId(AppConstants.NotificationChannelName);
    }

    var notificationManager = NotificationManager.FromContext(this);
    notificationManager.Notify(0, notificationBuilder.Build());
}

void SendMessageToMainPage(string body)
{
    (App.Current.MainPage as MainPage)?.AddMessage(body);
}
Incoming messages are converted to a local notification with the SendLocalNotification method. This method creates a new Intent and places the message content into the Intent as a string Extra. When the user taps the local notification, whether the app is in the foreground or the background, the MainActivity is launched and has access to the message contents through the Intent object.
The local notification and Intent example requires the user to take the action of tapping on the notification. This is desirable when the user should take action before the application state changes. However, you may want to access the message data without requiring a user action in some cases. The previous example also sends the message directly to the current MainPage instance with the SendMessageToMainPage method. In production, if you implement both methods for a single message type, the MainPage object will get duplicate messages if the user taps the notification.
Note
The Android application will only receive push notifications if it is running in either the background or foreground. To receive push notifications when the main Activity is not running, you must implement a service, which is beyond the scope of this sample. For more information, see Creating Android Services
Add incoming notifications to the Xamarin.Forms UI
The MainActivity class needs to obtain permission to handle notifications and manage incoming message data. The following code shows the complete MainActivity implementation:C#Copy
[Activity(Label = "NotificationHubSample", Icon = "@mipmap/icon", Theme = "@style/MainTheme", MainLauncher = true, ConfigurationChanges = ConfigChanges.ScreenSize | ConfigChanges.Orientation, LaunchMode = LaunchMode.SingleTop)]
public class MainActivity : global::Xamarin.Forms.Platform.Android.FormsAppCompatActivity
{
    protected override void OnCreate(Bundle savedInstanceState)
    {
        TabLayoutResource = Resource.Layout.Tabbar;
        ToolbarResource = Resource.Layout.Toolbar;

        base.OnCreate(savedInstanceState);

        global::Xamarin.Forms.Forms.Init(this, savedInstanceState);
        LoadApplication(new App());

        if (!IsPlayServiceAvailable())
        {
            throw new Exception("This device does not have Google Play Services and cannot receive push notifications.");
        }

        CreateNotificationChannel();
    }

    protected override void OnNewIntent(Intent intent)
    {
        if (intent.Extras != null)
        {
            var message = intent.GetStringExtra("message");
            (App.Current.MainPage as MainPage)?.AddMessage(message);
        }

        base.OnNewIntent(intent);
    }

    bool IsPlayServiceAvailable()
    {
        int resultCode = GoogleApiAvailability.Instance.IsGooglePlayServicesAvailable(this);
        if (resultCode != ConnectionResult.Success)
        {
            if (GoogleApiAvailability.Instance.IsUserResolvableError(resultCode))
                Log.Debug(AppConstants.DebugTag, GoogleApiAvailability.Instance.GetErrorString(resultCode));
            else
            {
                Log.Debug(AppConstants.DebugTag, "This device is not supported");
            }
            return false;
        }
        return true;
    }

    void CreateNotificationChannel()
    {
        // Notification channels are new as of "Oreo".
        // There is no need to create a notification channel on older versions of Android.
        if (Build.VERSION.SdkInt >= BuildVersionCodes.O)
        {
            var channelName = AppConstants.NotificationChannelName;
            var channelDescription = String.Empty;
            var channel = new NotificationChannel(channelName, channelName, NotificationImportance.Default)
            {
                Description = channelDescription
            };

            var notificationManager = (NotificationManager)GetSystemService(NotificationService);
            notificationManager.CreateNotificationChannel(channel);
        }
    }
}
The Activity attribute sets the application LaunchMode to SingleTop. This launch mode tells the Android OS to only allow a single instance of this activity. With this launch mode, incoming Intent data is routed to the OnNewIntent method, which extracts message data and sends it to the MainPage instance through the AddMessage method. If your application uses a different launch mode, it must handle Intent data differently.
The OnCreate method uses a helper method called IsPlayServiceAvailable to ensure the device supports Google Play Service. Emulators or devices that do not support Google Play Service cannot receive push notifications from Firebase.
Configure iOS for notifications
The process for configuring the iOS application to receive notifications is:
- Configure the Bundle Identifier in the Info.plist file to match the value used in the provisioning profile.
- Add the Enable Push Notifications option to the Entitlements.plist file.
- Add the Xamarin.Azure.NotificationHubs.iOS NuGet package to your project.
- Register for notifications with APNS.
- Register the application with Azure Notification Hub and subscribe to tags.
- Add APNS notifications to Xamarin.Forms UI.
The following screenshot shows the Enable Push Notifications option selected in the Entitlements.plist file within Visual Studio:

Register for notifications with APNS
The FinishedLaunching method in the AppDelegate.cs file must be overridden to register for remote notifications. Registration differs depending on the iOS version being used on the device. The iOS project in the sample application overrides the FinishedLaunching method to call RegisterForRemoteNotifications as shown in the following example:C#Copy
public override bool FinishedLaunching(UIApplication app, NSDictionary options)
{
    global::Xamarin.Forms.Forms.Init();
    LoadApplication(new App());

    base.FinishedLaunching(app, options);

    RegisterForRemoteNotifications();

    return true;
}

void RegisterForRemoteNotifications()
{
    // register for remote notifications based on system version
    if (UIDevice.CurrentDevice.CheckSystemVersion(10, 0))
    {
        UNUserNotificationCenter.Current.RequestAuthorization(UNAuthorizationOptions.Alert |
            UNAuthorizationOptions.Sound |
            UNAuthorizationOptions.Sound,
            (granted, error) =>
            {
                if (granted)
                    InvokeOnMainThread(UIApplication.SharedApplication.RegisterForRemoteNotifications);
            });
    }
    else if (UIDevice.CurrentDevice.CheckSystemVersion(8, 0))
    {
        var pushSettings = UIUserNotificationSettings.GetSettingsForTypes(
        UIUserNotificationType.Alert | UIUserNotificationType.Badge | UIUserNotificationType.Sound,
        new NSSet());

        UIApplication.SharedApplication.RegisterUserNotificationSettings(pushSettings);
        UIApplication.SharedApplication.RegisterForRemoteNotifications();
    }
    else
    {
        UIRemoteNotificationType notificationTypes = UIRemoteNotificationType.Alert | UIRemoteNotificationType.Badge | UIRemoteNotificationType.Sound;
        UIApplication.SharedApplication.RegisterForRemoteNotificationTypes(notificationTypes);
    }
}
Register with Azure Notification Hub and subscribe to tags
When the device has successfully registered for remote notifications during the FinishedLaunching method, iOS will call the RegisteredForRemoteNotifications method. This method should be overridden to perform the following actions:
- Instantiate the
SBNotificationHub. - Unregister any existing registrations.
- Register the device with your notification hub.
- Subscribe to specific tags with a template.
For more information about registration of the device, templates, and tags, see Register templates and tags with the Azure Notification Hub. The following code demonstrates registration of the device and templates:C#Copy
public override void RegisteredForRemoteNotifications(UIApplication application, NSData deviceToken)
{
    Hub = new SBNotificationHub(AppConstants.ListenConnectionString, AppConstants.NotificationHubName);

    // update registration with Azure Notification Hub
    Hub.UnregisterAll(deviceToken, (error) =>
    {
        if (error != null)
        {
            Debug.WriteLine($"Unable to call unregister {error}");
            return;
        }

        var tags = new NSSet(AppConstants.SubscriptionTags.ToArray());
        Hub.RegisterNative(deviceToken, tags, (errorCallback) =>
        {
            if (errorCallback != null)
            {
                Debug.WriteLine($"RegisterNativeAsync error: {errorCallback}");
            }
        });

        var templateExpiration = DateTime.Now.AddDays(120).ToString(System.Globalization.CultureInfo.CreateSpecificCulture("en-US"));
        Hub.RegisterTemplate(deviceToken, "defaultTemplate", AppConstants.APNTemplateBody, templateExpiration, tags, (errorCallback) =>
        {
            if (errorCallback != null)
            {
                if (errorCallback != null)
                {
                    Debug.WriteLine($"RegisterTemplateAsync error: {errorCallback}");
                }
            }
        });
    });
}
Note
Registering for remote notifications can fail in situations such as no network connection. You can choose to override the FailedToRegisterForRemoveNotifications method to handle registration failure.
Add APNS notifications to Xamarin.Forms UI
When a device receives a remote notification, iOS calls the ReceivedRemoteNotification method. Incoming message JSON is converted into an NSDictionary object, and the ProcessNotification method extracts values from the dictionary and sends them to the Xamarin.Forms MainPage instance. The ReceivedRemoteNotifications method is overridden to call ProcessNotification as shown in the following code:C#Copy
public override void ReceivedRemoteNotification(UIApplication application, NSDictionary userInfo)
{
    ProcessNotification(userInfo, false);
}

void ProcessNotification(NSDictionary options, bool fromFinishedLaunching)
{
    // make sure we have a payload
    if (options != null && options.ContainsKey(new NSString("aps")))
    {
        // get the APS dictionary and extract message payload. Message JSON will be converted
        // into a NSDictionary so more complex payloads may require more processing
        NSDictionary aps = options.ObjectForKey(new NSString("aps")) as NSDictionary;
        string payload = string.Empty;
        NSString payloadKey = new NSString("alert");
        if (aps.ContainsKey(payloadKey))
        {
            payload = aps[payloadKey].ToString();
        }

        if (!string.IsNullOrWhiteSpace(payload))
        {
            (App.Current.MainPage as MainPage)?.AddMessage(payload);
        }

    }
    else
    {
        Debug.WriteLine($"Received request to process notification but there was no payload.");
    }
}
Test notifications in the Azure portal
Azure Notification Hubs enable you to check that your application can receive test messages. The Test Send section in the notification hub allows you to choose the target platform and send a message. Setting the Send to Tag expression to default will send messages to applications that have registered a template for the default tag. Clicking the Send button generates a report that includes the number of devices reached with the message. The following screenshot shows an Android notification test in the Azure portal:

Testing tips
- When testing that an application can receive push notifications, you must use a physical device. Android and iOS virtual devices may not be configured correctly to receive push notifications.
- The sample Android application registers its token and templates once when the Firebase token is issued. During testing you may need to request a new token and re-register with the Azure Notification Hub. The best way to force this is to clean your project, delete the
binandobjfolders and uninstall the application from the device before rebuilding and deploying. - Many parts of the push notification flow are executed asynchronously. This may result in breakpoints not being hit or being hit in an unexpected order. Use device or debug logging to trace execution without interrupting application flow. Filter the Android device log using the
DebugTagspecified inConstants. - When debugging is stopped in Visual Studio, the app is force closed. Any message receivers or other services launched as part of the debugging process will be closed and will not respond to message events.
Create a notification dispatcher
Azure Notification Hubs enable your backend application to dispatch notifications to devices across platforms. The sample demonstrates notification dispatch with the NotificationDispatcher console application. The application includes the DispatcherConstants.cs file, which defines the following properties:C#Copy
public static class DispatcherConstants
{
    public static string[] SubscriptionTags { get; set; } = { "default" };
    public static string NotificationHubName { get; set; } = "< Insert your Azure Notification Hub name >";
    public static string FullAccessConnectionString { get; set; } = "< Insert your DefaultFullSharedAccessSignature >";
}
You must configure the DispatcherConstants.cs to match your Azure Notification Hub configuration. The value of the SubscriptionTags property should match the values used in the client apps. The NotificationHubName property is the name of your Azure Notification Hub instance. The FullAccessConnectionString property is the access key found in your notification hub Access Policies. The following screenshot shows the location of the NotificationHubName and FullAccessConnectionString properties in the Azure portal:

The console application loops through each SubscriptionTags value and sends notifications to subscribers using an instance of the NotificationHubClient class. The following code shows the console application Program class:C#Copy
class Program
{
    static int messageCount = 0;

    static void Main(string[] args)
    {
        Console.WriteLine($"Press the spacebar to send a message to each tag in {string.Join(", ", DispatcherConstants.SubscriptionTags)}");
        WriteSeparator();
        while (Console.ReadKey().Key == ConsoleKey.Spacebar)
        {
            SendTemplateNotificationsAsync().GetAwaiter().GetResult();
        }
    }

    private static async Task SendTemplateNotificationsAsync()
    {
        NotificationHubClient hub = NotificationHubClient.CreateClientFromConnectionString(DispatcherConstants.FullAccessConnectionString, DispatcherConstants.NotificationHubName);
        Dictionary<string, string> templateParameters = new Dictionary<string, string>();

        messageCount++;

        // Send a template notification to each tag. This will go to any devices that
        // have subscribed to this tag with a template that includes "messageParam"
        // as a parameter
        foreach (var tag in DispatcherConstants.SubscriptionTags)
        {
            templateParameters["messageParam"] = $"Notification #{messageCount} to {tag} category subscribers!";
            try
            {
                await hub.SendTemplateNotificationAsync(templateParameters, tag);
                Console.WriteLine($"Sent message to {tag} subscribers.");
            }
            catch (Exception ex)
            {
                Console.WriteLine($"Failed to send template notification: {ex.Message}");
            }
        }

        Console.WriteLine($"Sent messages to {DispatcherConstants.SubscriptionTags.Length} tags.");
        WriteSeparator();
    }

    private static void WriteSeparator()
    {
        Console.WriteLine("==========================================================================");
    }
}
When the sample console application is run, the spacebar can be pressed to send messages. Devices running the client applications should receive numbered notifications, provided they are properly configured.


